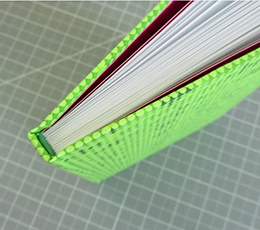
Case Bound Hardcover Book Tutorial
https://www.youtube.com/watch?v=Av_rU-yOPd4
In this video tutorial, by Jennifer of Sea Lemon, you will learn how to create a hardcover case binding for your DIY book project. This type of hardcover can be applied to a book block that has been perfect bound or sewn. With the simple addition of end papers to your book block, you can attach a hard cover to any book.
To follow along with this tutorial you will need the following supplies:
- Pre-bound Book Block (sewn or perfect bound)
- Book Board (use acid-free materials)
- Book Cover Material (paper, cloth, leather, or other suitable material)
- PVA glue
You will also need the following tools:
- Pencil
- Steel Ruler
- Self Healing Cutting Mat
- Bone Folder
- Utility Knife
- X-Acto Knife or Scissors
- Glue Brush
- Weights
- Book Press (optional)
Step One: Measure and Cut Book Boards
The first step of the process is to cut the book boards that will provide the stiffness for your cover. These are made from a heavy weight acid-free cardboard. Make sure to choose acid-free material or the acids in the cardboard will discolor your book over time.
You will need to measure your book block and add a little extra to every side (except the spine) to allow the cover to overhang the pages slightly in your finished book.
Step Two: Glue the Book Boards to the Cover Material
Place the material you have chosen face down on the table. Next, apply PVA glue to the first book board and position it on the cover. Repeat the process with the spine and back cover board allowing enough space between each part for the cover to fold as it wraps around the book block.
Turn the cover over and use a bone folder to work out any air bubbles between the paper and book boards.
Place weights or some heavy books over the cover and let the glue dry. This will help prevent the cover from warping.
Step Three: Wrapping the Edges
Flip the cover face down on the table again and trim the excess material at the corners. Then, work your way around the edges folding over the cover material and gluing it to the back of the book block.
Step Four: Gluing the Cover to the Book Block
The final step in the process is to glue the end papers to the front and back cover of the book. Apply PVA glue to the cover and end paper. Position the end paper on the cover leaving an even reveal around the edges. Then, use the bone folder to work out any air bubbles.
Repeat the process on the other side and then apply weight again to press everything flat again while the glue dries. If you have a book press, you can use that instead of weights to hold everything flat. Place a sheet of waxed paper just inside the front and back cover to prevent any excess glue from seeping out and damaging the book block.
Congratulations!
Once the glue has dried, remove the weights, discard the waxed paper, and admire your new hand-crafted hardcover book!


